Mass Equipment Instantiation (Excel)
- Tutorial
Tutorial
This tutorial describes the recommended way to create and maintain a large number of devices in Immersive using a Excel. It presents the structure of the file, the information necessary to define the equipment and its handles, as well as the import process from the back office Enhancer.
Reminder: handle or variable principle
A handle (or variable), represents a property of a piece of equipment. It is the link between data from a sensor or static data and its display in the interface.
To define a handle, it is essential to fill in at least four pieces of information:
- Its name : The text displayed in the interface to reference the variable.
- His type : for example a Boolean for a dry contact, a Single for a numerical data such as a temperature sensor, or a String for a state.
- His path : the connection string used to define how the variable retrieves its value from the application (example:
BuildingSensor://temp/Temperature). - Its category (Default Information):
- Information —Is the default display of a variable. It does not trigger any specific behavior other than displaying its value in the dedicated Information block.
- Default : Displayed in the dedicated block of the equipment. When the variable is set to true, 1, or kb, it is displayed in red and the device is considered to be at fault in the application.
- Maintenance : Displayed in the dedicated block of the equipment. When the variable is set to true, 1, or kb, it is displayed in orange and the device is considered to be under maintenance in the application.
- Connectivity : Displayed in the dedicated block of the equipment. When the variable is set to true, 1, or KB, it causes the device to be completely disconnected from the application.
For more information, refer to the tutorial associated with the hub.
To set a fixed value without being connected to the hub, simply prefix the value with Value:// (Example: Value://35).
Mass Equipment Instantiation (Excel)
Although it is possible to create the equipment directly from the back office (Enhancer), the most commonly used method for creating and maintaining the equipment is based on the use of an Excel file (link to the Excel template).
This Excel file describes the complete list of handles, along with information about the equipment to which they are attached. Once completed, it can be imported into the back office (Enhancer) to automatically create equipment, equipment families, and associated handles.
Each row in the sheet of a family represents a handle, and each column represents a piece of data associated with that handle. (The values sufficed by an asterix * represent the mandatory data to be declared for a handle, the others remain optional).
- Scope * : The name of the scope in which the device attached to this handle belongs. (example: My Building)This information must be the same for all handles belonging to the same equipment.
- Family * : The name of the family of the equipment to which the handle belongs. (example: Temperature sensor)This information must be the same for all handles belonging to the same equipment.
- Equipment Name * : The name of the device (displayed at the interface) to which the handle belongs. (example: Sensor Room)This information must be the same for all handles belonging to the same equipment.
- Equipment reference * :The UNIQUE reference of the equipment to which the handle belongs. (example: MyBuilding/Temperature/Room 1). This information must be the same for all handles belonging to the same equipment and must never change. This is the identifier used by Immersive to know when a piece of equipment is updated.
- Description : An optional description added to the equipment to which the handle belongs.
- Location : An optional location added to the equipment to which the handle belongs.
- Interoperability ID : An optional interoperability identifier
- Property * : The name of the handle (example: Temperature)
- Property reference : A business code to reference the handle in scripts (example: TEMP)
- Interoperability ID : A business identifier associated with the handle declared in another environment.
- Path / Chemin * : The connection string used to define how the handle retrieves its value from the application (example BuildingSensor://temp/Temperature). See the tutorial associated with the hub for more information. To set a value of a hard-coded variable without being connected to the hub, simply prefix it with "Value://" (example: Value://35)
- Type * : The type of the handle, (example Single for a numeric variable, String for a string or Boolean for a 2-state variable).
- Physical Quantity : The physical quantity reported by this variable. (example: Temperature)
- Unit : The unit of measurement. (example: Celsius)
- Automatic status : The handle category. See the tutorial associated with variable categories for more information.
- Options : Various options to fine-tune the behavior of this handle in the interface. In particular to hide the variable from users.
- Badge / Criticality : A badge name. See the tutorial associated with criticality badges for more information.
- Priority : A priority to highlight one variable over the others.
Example of the definition of 2 handles assigned to the same equipment:

Once the file has been filled, it is now necessary to import it into Immersive.
Excel import from the back office (Enhancer)
In this tutorial, we'll look at how to import a bulk equipment instantiation file.
All the actions in this tutorial are done from the category Métier > IOT of your Immersive Backend.
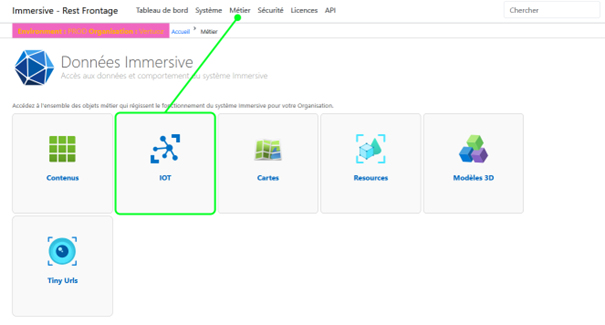
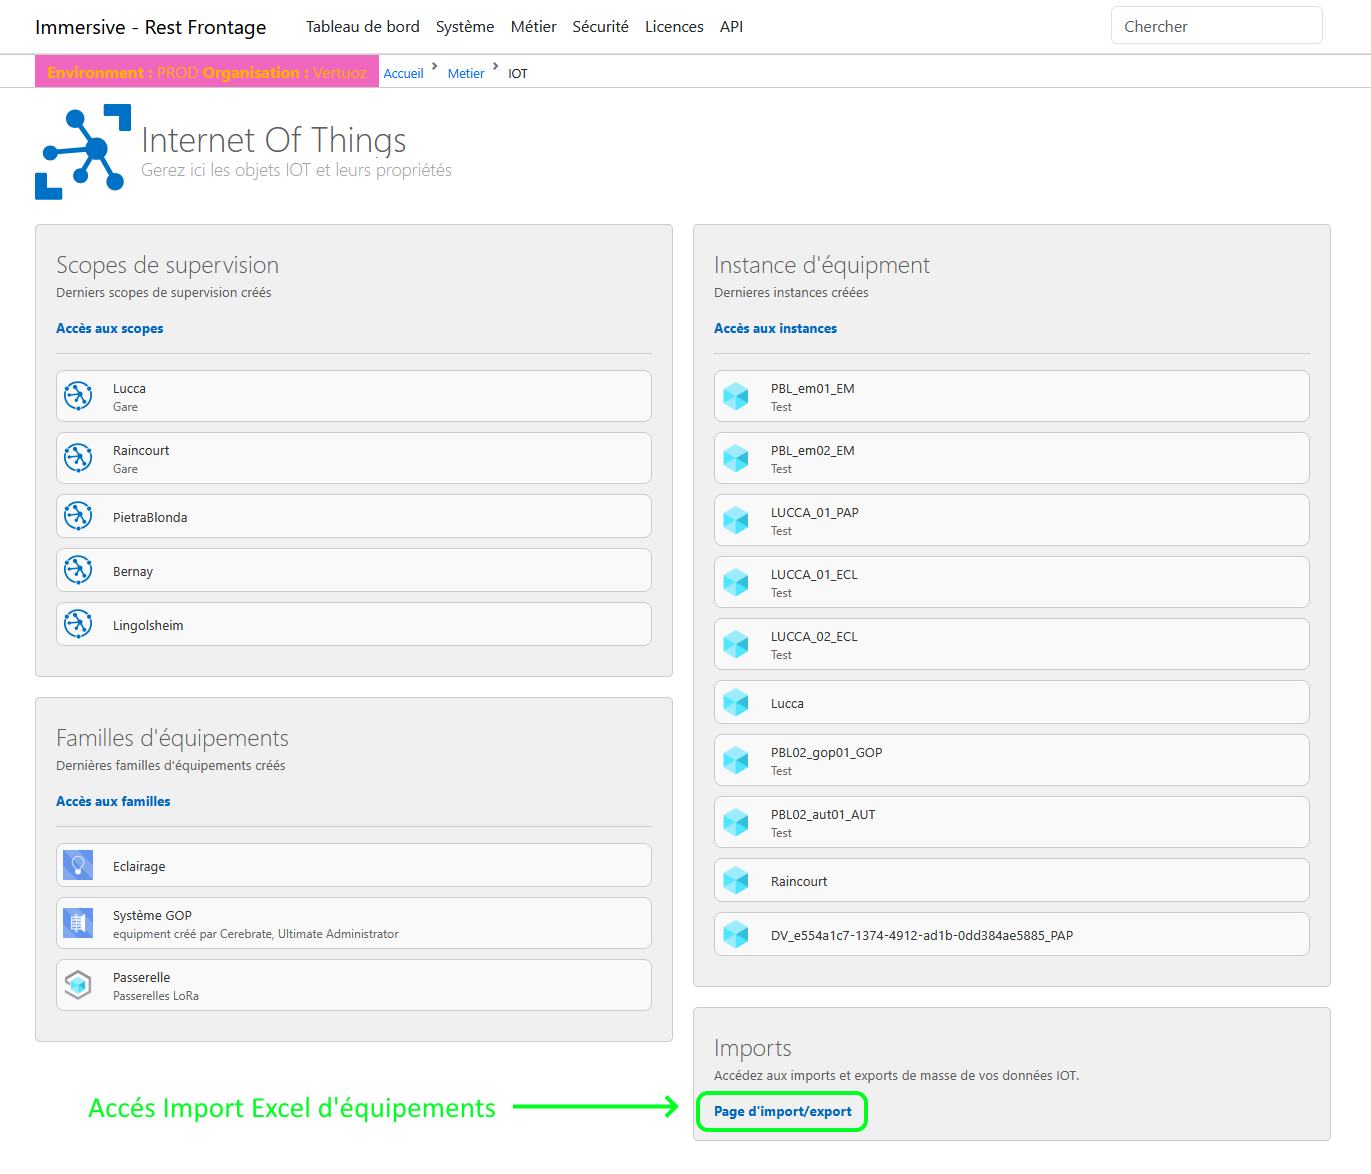
Once in the category IOT, click Page d’import/export in the boc Imports to access the next window.
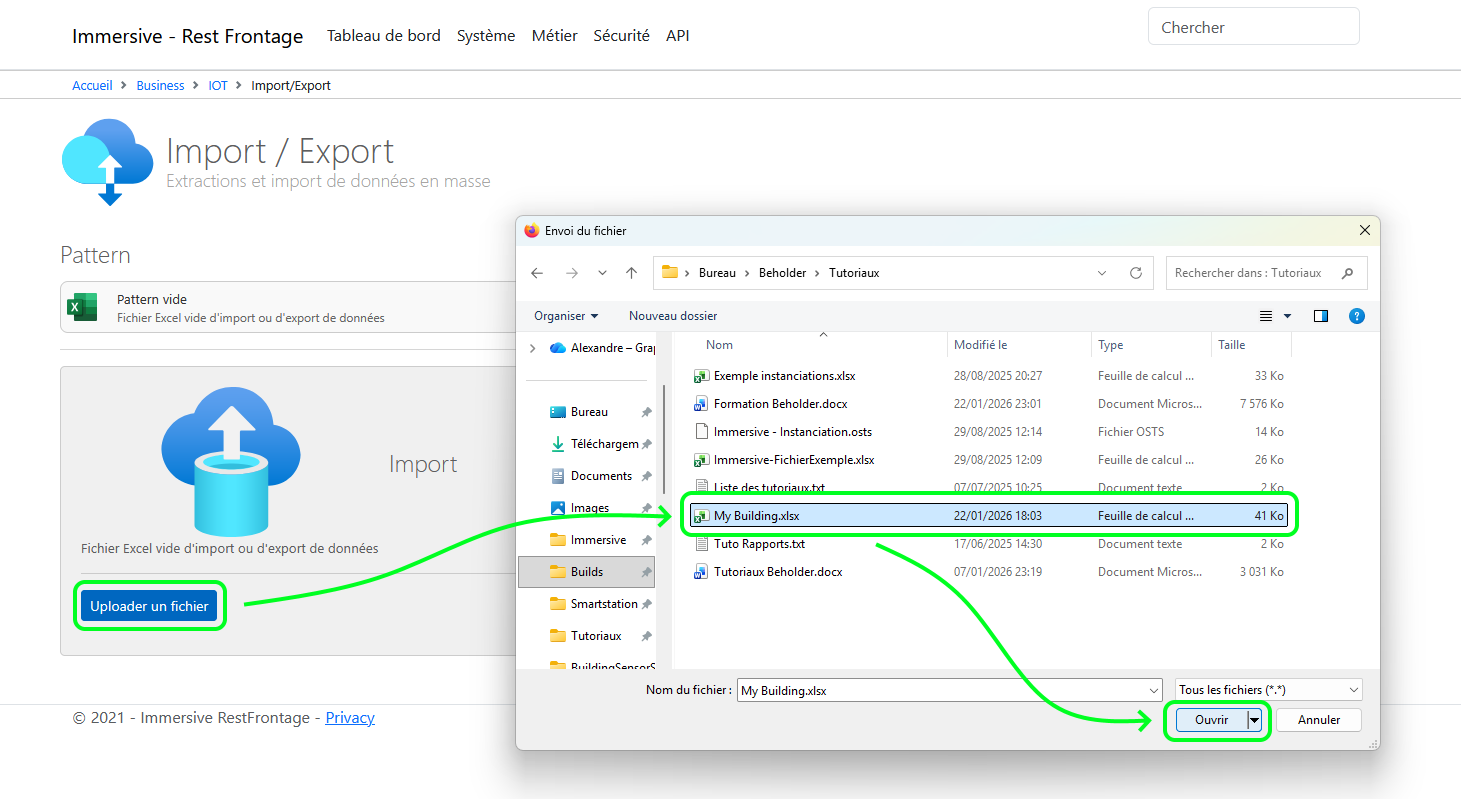
Once in the Import/Export page, click on the Uploader un fichier, choose the file you want to import, and click Ouvrir
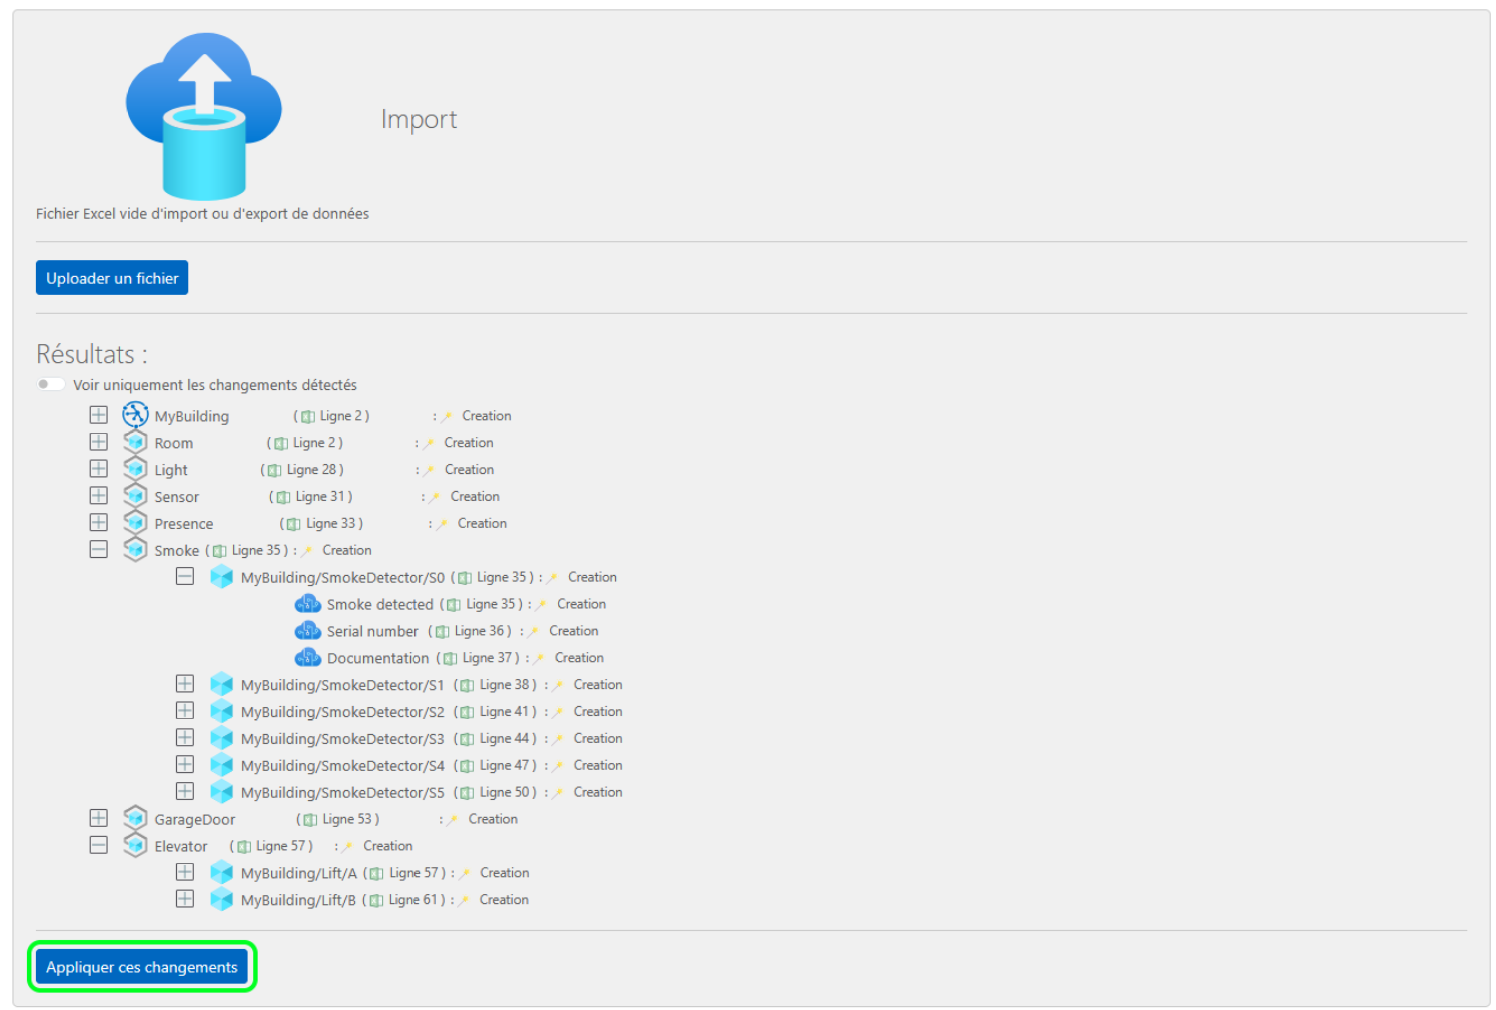
Once imported, the import tool displays:
- If successful: a preview in the form of a hierarchy of the changes (creation, modification or deletion) that he will make to the database.
- On failure: the reason for the failure (e.g. file format not respected)
If successful, the system displays:
- Changes to scopes (addition)
- Changes to equipment families (addition)
- Equipment modifications (addition, modification)
- Modifications to equipment handles (add, modify, delete)
If an object already exists and has not undergone any changes, it will be ignored.
When importing, only handles can be deleted, as importing a file will not delete any existing scope, family or equipment.
If at least 1 handle is declared for a piece of equipment, the existing handles associated with the equipment will be replaced by the new one(s).
The equipment is identified using the "Equipment reference" property, which is why it is important that it does not change. If it changes, the equipment will be considered new.
After controlling the actions that the import will perform on the database, you just have to click on Appliquer les changements to save the import in the database.