Contents: behaviors, scripting
- Tutorial
Training
This section details the Contents oriented Behaviors and Scripting : how to create, version, publish, and apply scripts and rules that drive the UI and the digital twin on the Beholder side.
Scripting is a powerful, simple and particularly effective way to modify the behavior of the Beholder.
Change the behavior of devices in response to data retrieved from the network, modify the user interface to simplify your users' actions, access APIs or perform processing? Scripting is an adequate response to any type of evolution of the Beholder without asking your users to update their tools.
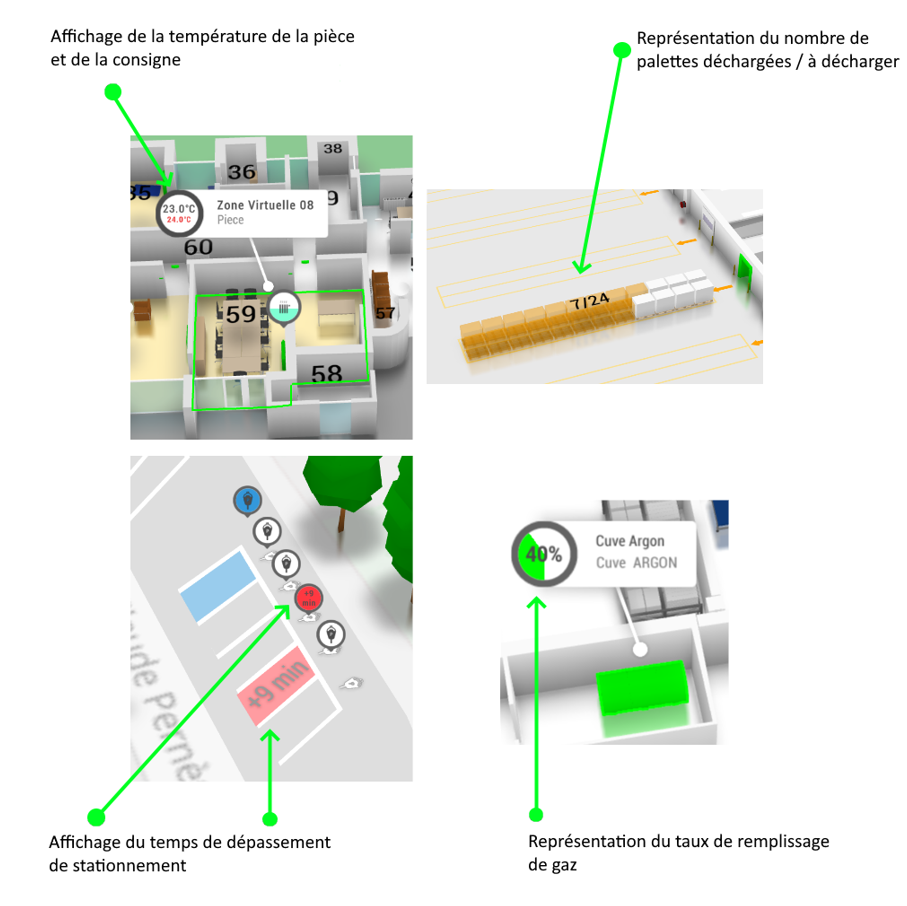
In this article we will discuss:
All the actions in this tutorial are done from the "Business > Content" category of your Immersive Backend.
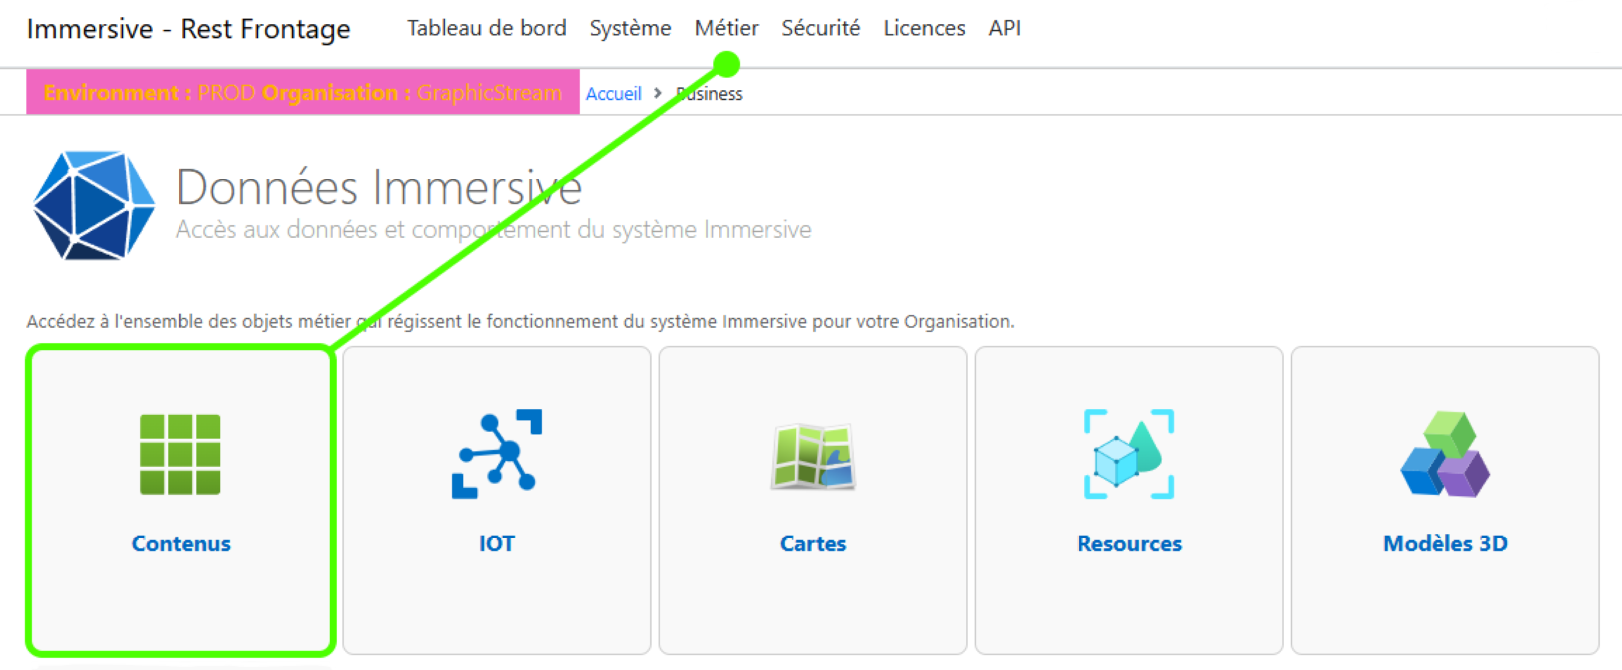
Creating a Workspace
The "Workspaces" represent a set of "Controllers" that will act on the ergonomics and the representation of data.
Users can have access to one or more Workspaces, however when the Beholder is launched, only one Workspace will be active during the session.
To create a new workspace, click on "Create a new workspace". The Workflow creation panel opens on the right of the interface, enter its name, description (optional) and validate the creation.
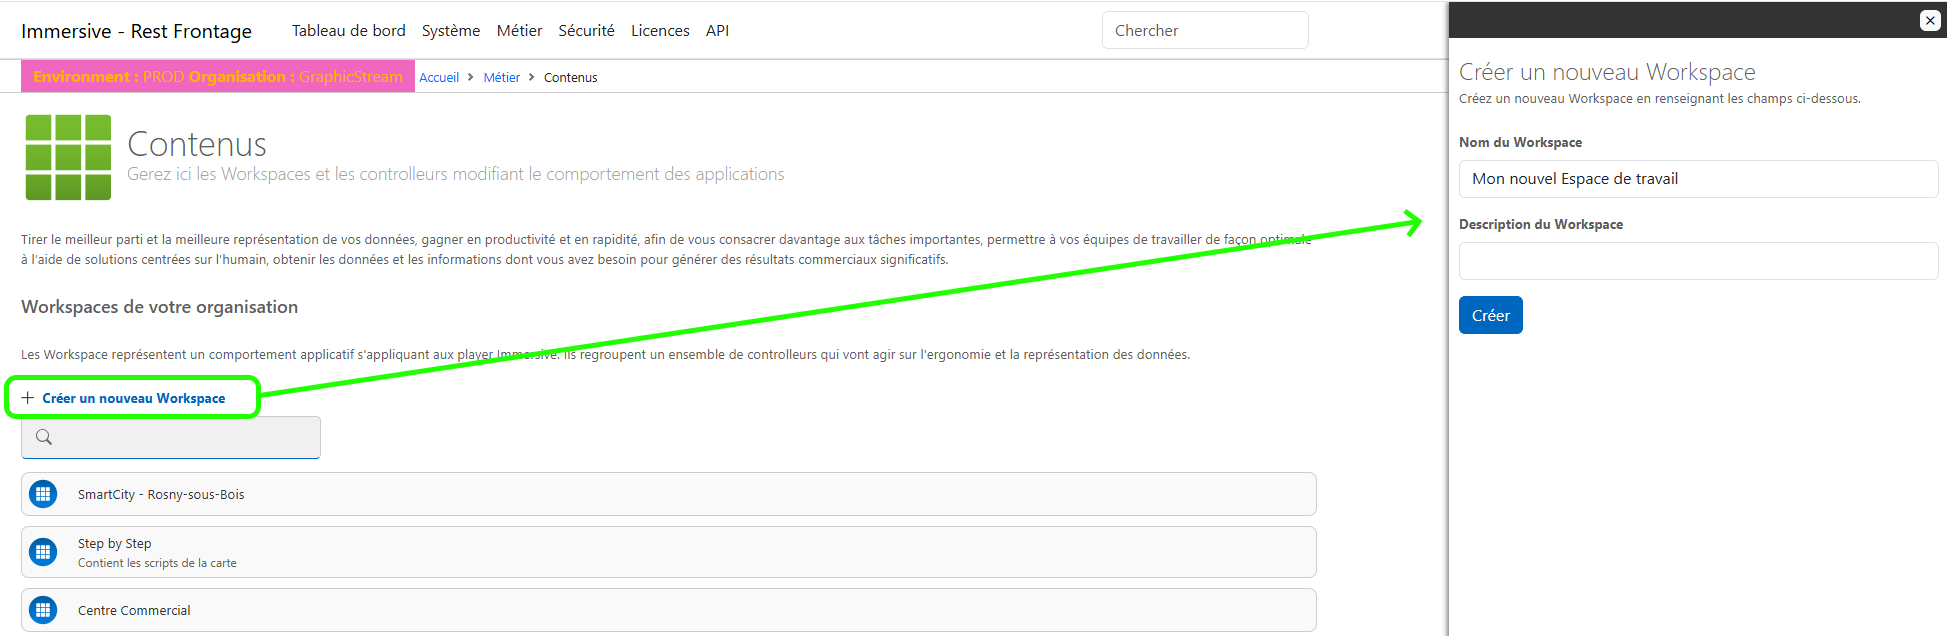
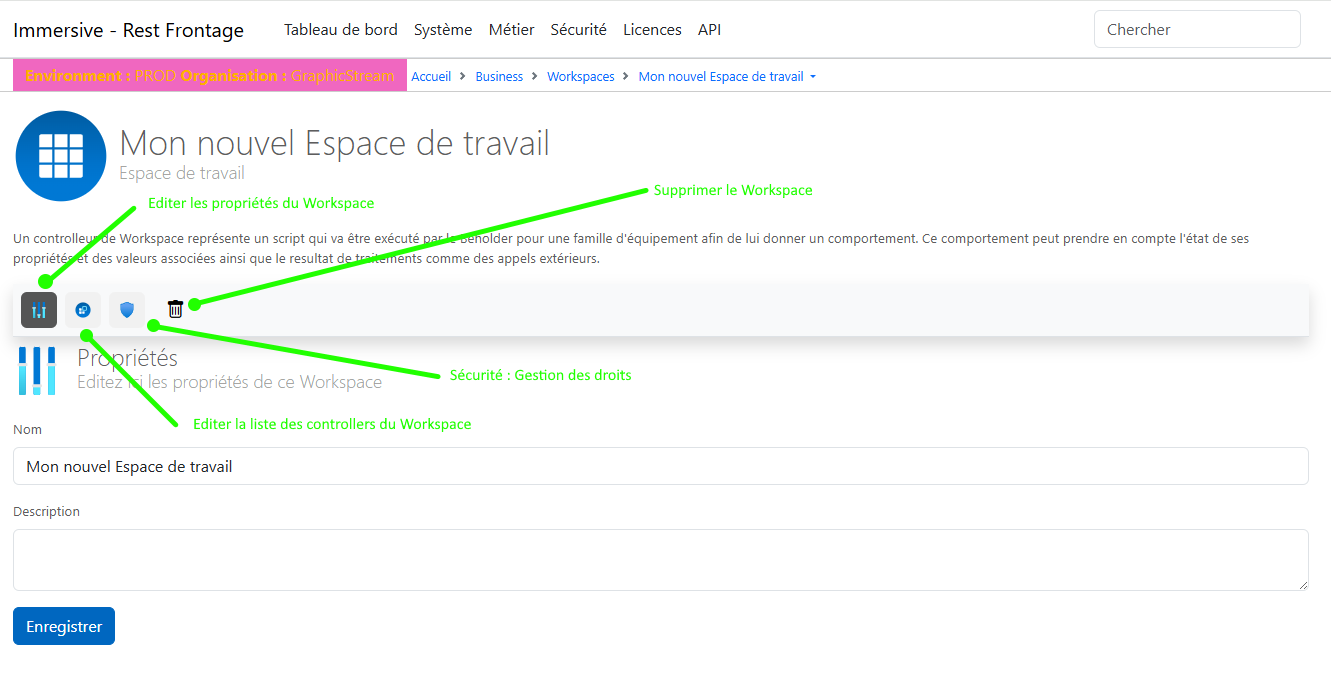
Once the Workspace is created, it now appears in the list of Workspaces in your environment. Simply click on one of the Workspaces to access its detailed file.
The different sub-parts of a Workspace sheet allow:
- Editing Workspace properties
- Access to the list of controllers associated with the Workspace, with the ability to add or remove a link
- Editing the Workspace's security rights to allow its access to a group of users.
- Removing the Workspace
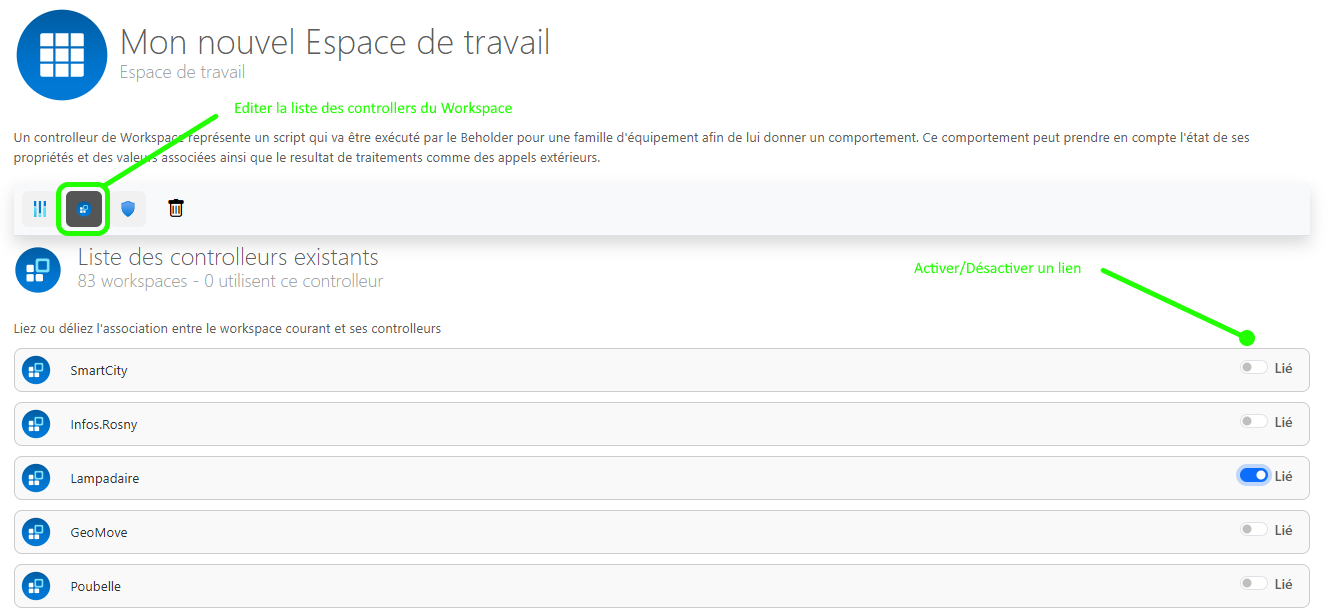
In order to associate a Controller with the Workspace, click on "Edit the list of Workspace controllers" and click on the toggle link button on the Controller's line.
Only the Controllers linked to the Workspace loaded in the Beholder will be active, the others will not be used. In the following example, only the "Street Light" Controller will be active.
Creating a Controller
A Controller represents a script that will be executed by the Beholder. There are different types of controllers that will be interpreted differently, each with a specific purpose.
Currently, the different types of Controller are:
- Parameterization controllers
- Use: Configure beholder settings at launch.
- Prefix: Info.
- Format: JSON
- Import rule: Not used
- Equipment scripting controllers
- Use: Scripting of one or more pieces of equipment.
- Prefix: None
- Format: Javascript
- Import Rule: Name of an equipment family, or $(Name of a handle)
- Application scripting controllers
- Use: Scripting of the beholder in its entirety without any link to a piece of equipment.
- Prefix: App.
- Format: Javascript
- Import rule: Not used
- Location controllers
- Use: Adding translation keys to the localization system.
- Prefix: Translation.
- Format: Text
- Import rule: the associated language (example fr-FR)
To create a new Controller, click on "Create a new Controller". The Controller's creation panel opens on the right of the interface, enter its name, a description (optional), the import rule and validate the creation.
The name of the controller is important, because depending on its prefix, it will be interpreted differently by the beholder.
The import rule depends on the type of controller, refer to the different tutorials describing each type of controller to know which rules to apply according to each case.
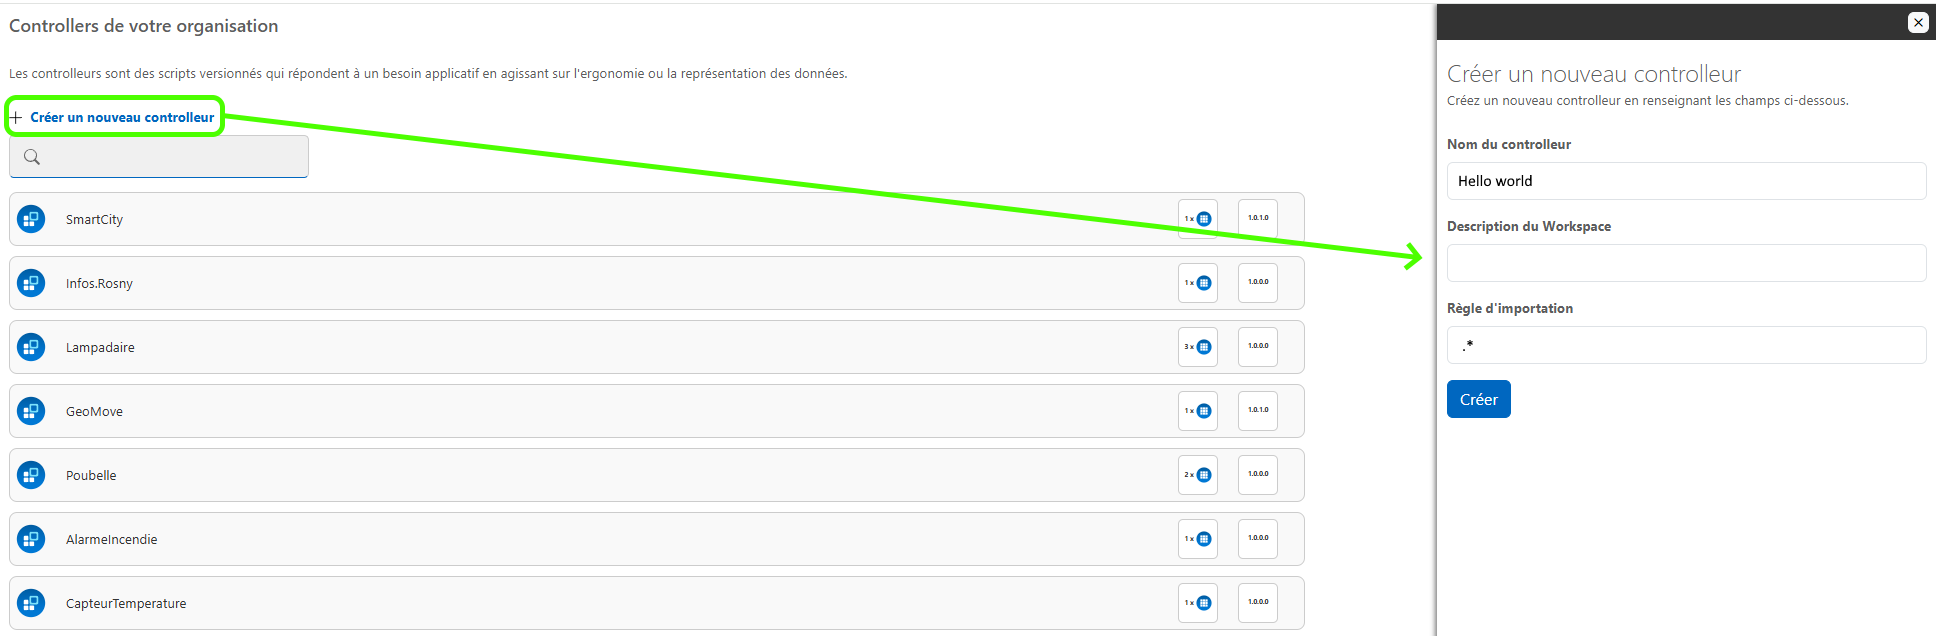
Once the Controller is created, it now appears in the list of Controllers in your environment. Simply click on one of the Controllers to access its detailed sheet.
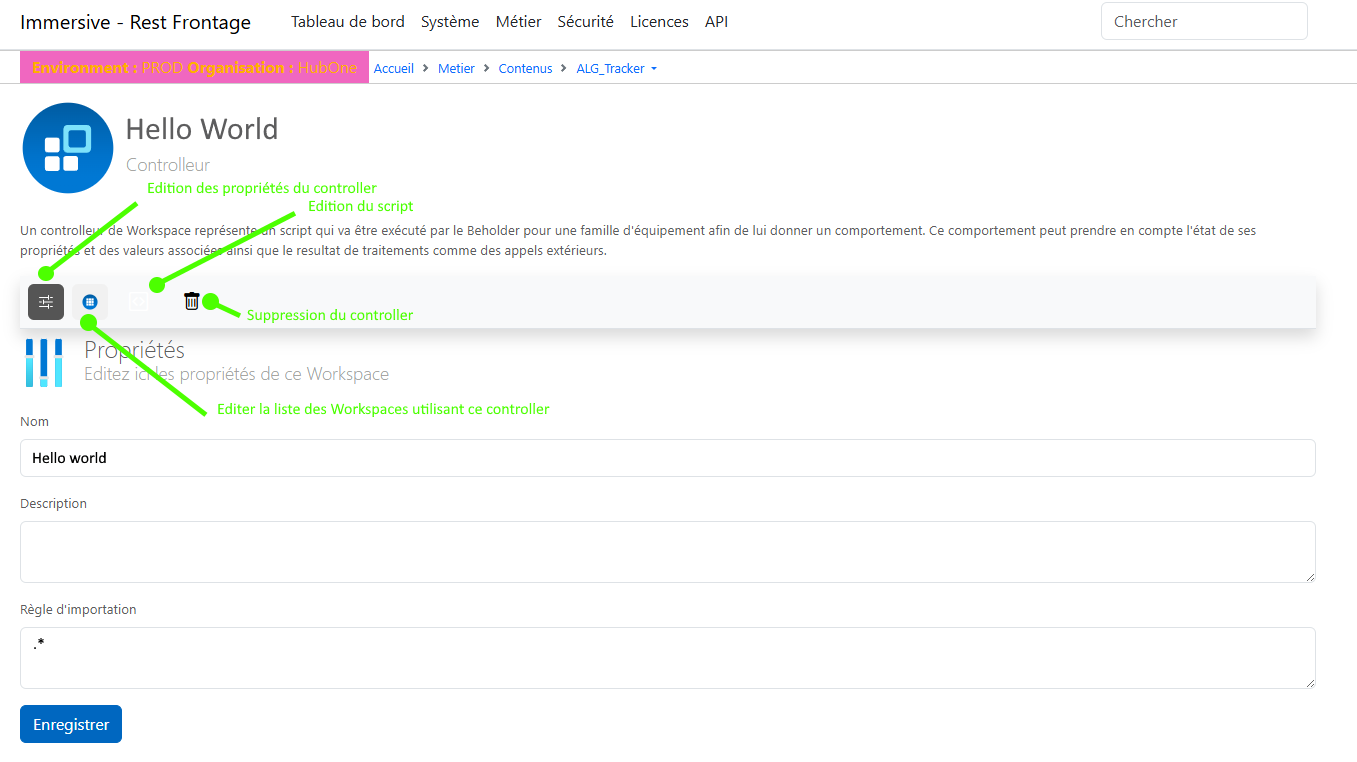
The different sub-parts of a Controller's plug allow:
- Editing Controller Properties
- Access to the list of Workspaces using this Controller, with the ability to add or remove a link
- Editing the script associated with the controller
- Removing the Controller
A controller without a script has no use, so you have to create a new version of the script and publish it to activate it.
A controller can have several versions of scripts saved (for the purpose of historization for temporary changes), but only the published version is retrieved and used by the Beholder.
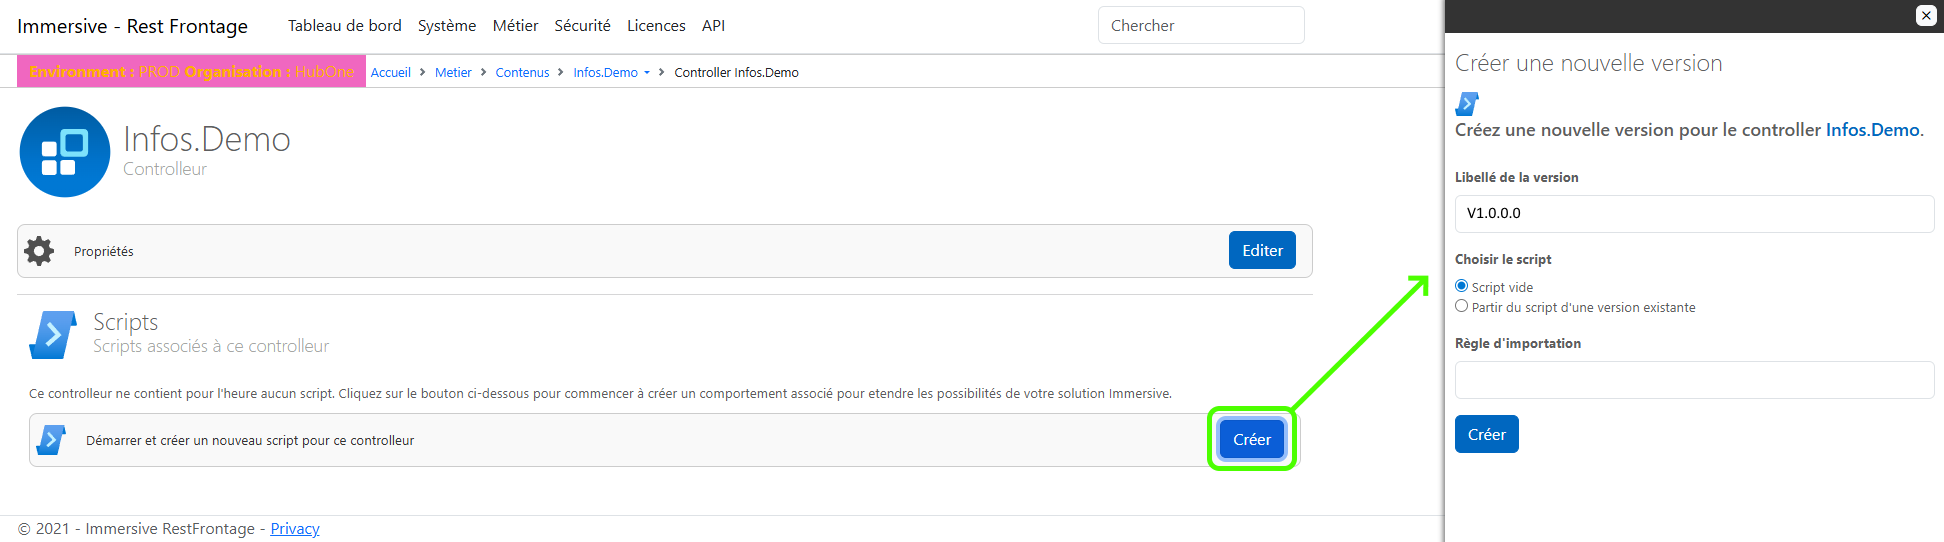
To create the first version of a script, click on "Edit script" then "Create" and enter a version number. There is no need to enter a new import rule, the general import rule to the Controller is used if it is not overridden in its script version.
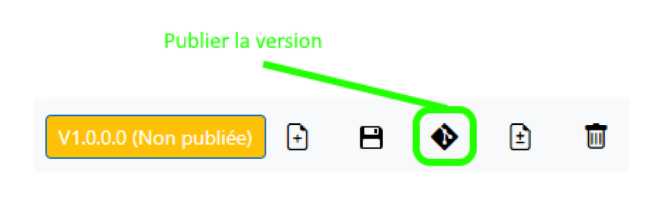
In case the Controller does not have any active version, or if the edited version is not the current version, simply click on the "Publish this version" button to assign it as an active version.
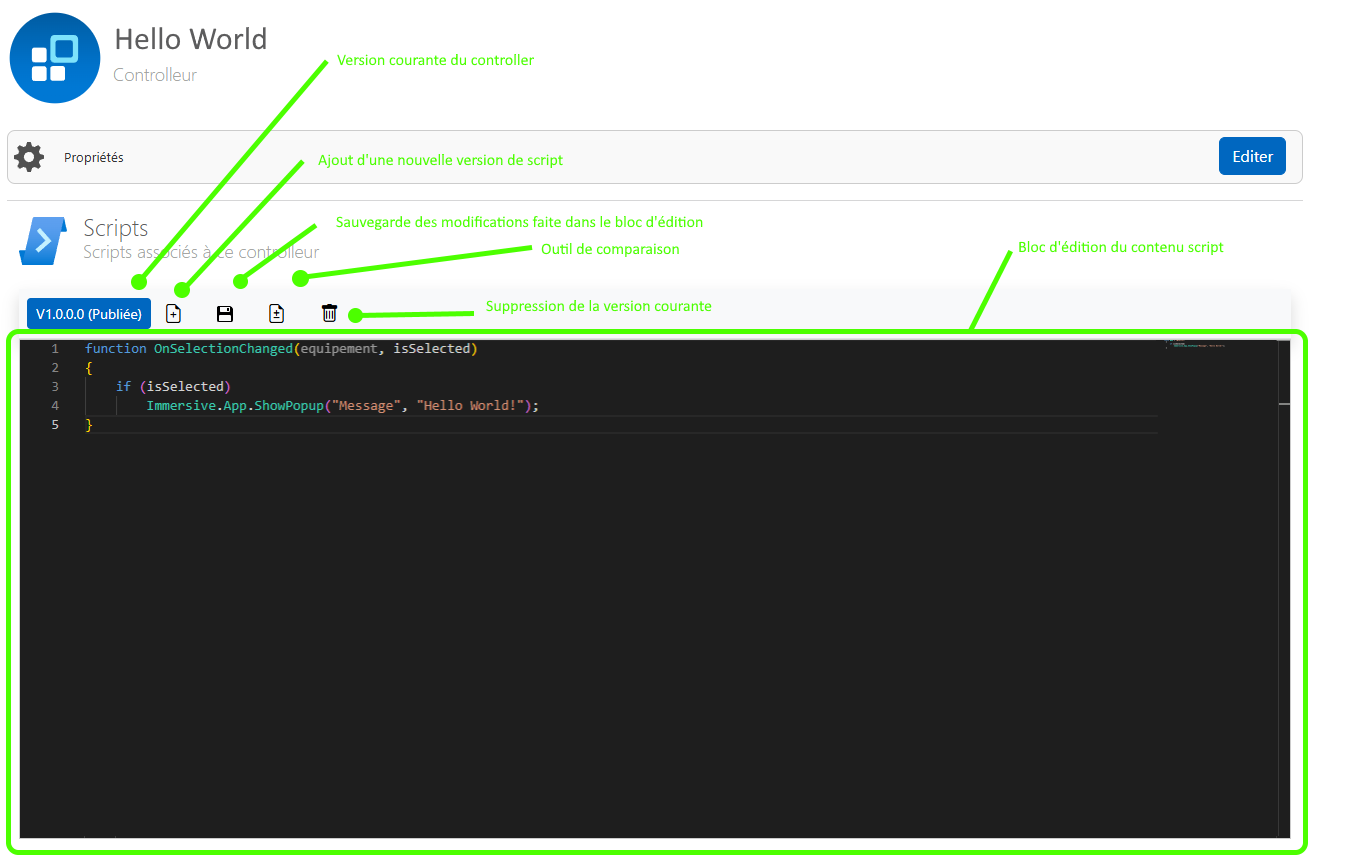
The content of the script can be edited in the editing block, and saved using the "Save" button. The next time you launch the Beholder, the changes applied to the script will be effective if the version is released and the Controller is linked to the Workspace you are launching.
Parameterization controllers
A parameter-type controller is used to configure the parameters of the Beholder at launch. The parameters can for example be used to configure the card to be loaded, the scope to be loaded, the address of the server (Hub).
In order to be interpreted as a configuration controller by the Beholder, the name of the controller must be prefixed with "Info.", e.g. "Info.My Factory"
The content of the script of a parameter controller must be in JSON format, associating a parameterization key and its value.
As the import rule is not interpreted, it is not necessary to fill in this information.
Example of a configuration controller that configures the beholder to load the card with the name "Factory", its associated scope and changes the title of the application.
{
"DefaultMapName": "Factory",
"Supervision.ScopeName": "Factory",
"Supervision.TitleName": "My Factory by Graphicstream",
}
The most commonly used settings in Controllers are the following:
- DefaultMapName: The name of the map to load?
- DefaultLevelName: The name of the level to be highlighted at launch.
- Supervision.ScopeName: The name or names of scopes to load. To load multiple scopes, they must be separated by a comma ",".
- Supervision.TitleName: The title of the Beholder displayed in the title bar.
- Supervision.HubAddress: The URL for connecting to the Hub.
- Supervision.UpdatesPeriod: The update frequency of calls to the Hub. (default 2 sec)
For more parameters, refer to the complete list of Beholder configuration parameters: << link to the doc>>
Equipment scripting controllers (Javascript)
An asset scripting controller is a Javascript script that is executed for all the devices it controls each time an event occurs. They are very useful because they allow you to customize how a piece of equipment reacts to a change in data and how it is represented in the interface or 3D map.
All controllers without a prefix are interpreted as equipment scripts.
To be able to associate a behavior script with a device, there are several rules that can be configured in the script import rule.
Associate a script with a device family:
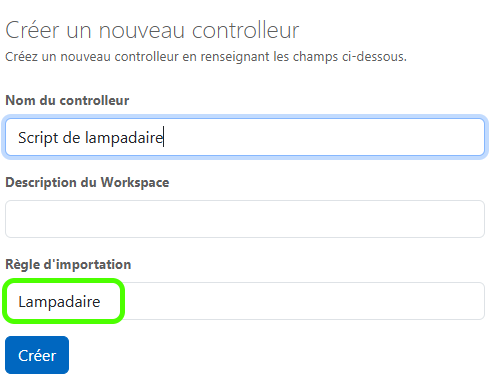
The easiest way to associate a script with all the devices in a family is to simply put the family name in the import rule.
In the following example, we create a script to customize the behavior of all the equipment belonging to the "Street Lamp" family.
Associate a script with multiple equipment families:
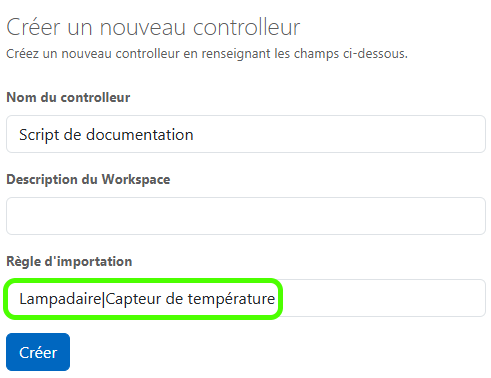
In the case where you want the script to apply to several families of devices, it is possible to separate the different family names with the character "|".
In the following example, we create a script to customize the behavior of all equipment belonging to the "Street Light" or "Temperature Sensor" family.
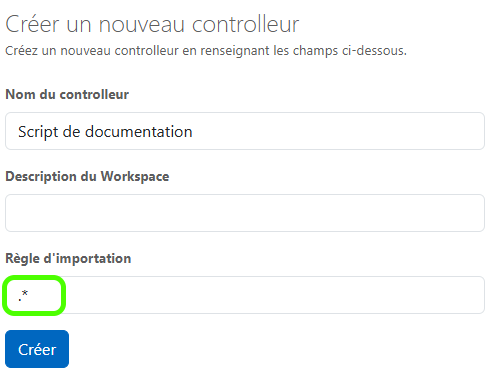
Associate a script with all the equipment:
In some cases, you want a script to run for all equipment, just enter as the import rule: ".*"
Associate a script with devices with a given variable:
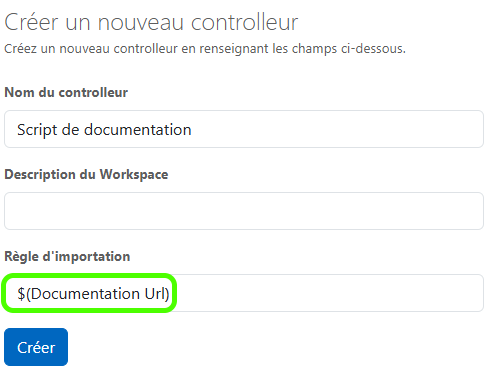
Very useful for generic scripting, it is possible that a script will only run for devices that have a variable. To do this, simply surround the name of a variable with "$( )".
In the following example, the documentation script will only run for devices that have a variable named "Documentation Url". Thus, the script could add a button to open the documentation, and use the value of the "Documentation Url" variable to open the correct documentation.
For more information on writing the content of a behavior script, refer to the "Scripting" tutorials, for now here is an example of a script that displays a message when a piece of equipment is selected.
function OnSelectionChanged(equipement, isSelected)
{
    if(isSelected)
Immersive.App.ShowPopup(«Message», « Hello World ! ») ;
}