ConnectorTester: Insure your extensions
- Getting started
ConnectorTester Overview
ConnectorTester is a tool designed to facilitate the development and validation of Immersive connectors. It allows you to launch a connector outside the full Hub in order to test, under controlled conditions, its behavior with regard to handles, exchanged values and commands (writes/scenes).
Training
The Hub Immersive represents the software layer that interfaces between the data exposure and its consumption by the Beholder.
It represents a universal layer of indirection between a consumer (an Immersive Beholder player for example) and data, regardless of the protocols used to access it.
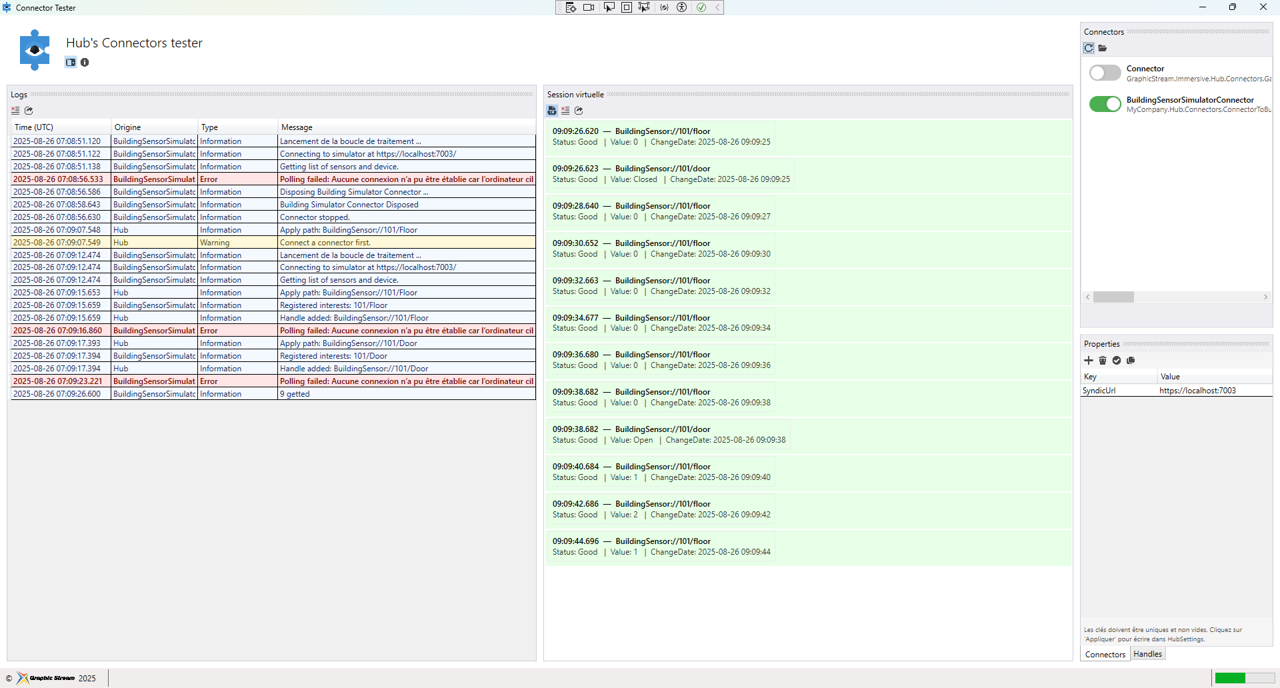
In this tutorial we start from the project MyCompany.Hub.Connectors.ConnectorToBuildingSensorSimulator described above here.
Role of the tool
- Insulation : Run a connector alone, without deploying the entire Hub.
- Validation : verify that the handles are correctly recognized and recorded according to the
Patterndefined. - Debug : Observe status messages (StateMessages) and notifications published by the connector.
- Simulation : Test the lifecycles (Initialize, Connect, Disconnect) and ensure that the connector responds as expected.
Why use ConnectorTester?
When developing a connector, several elements must be tested before integration into the Hub:
- That the method
CanHandlefilters well the paths that belong to it. - That
HandleHandlesCorrectly records the couples Device/Property. - Value updates are published as
HandleSnapshot. - That the writings (
WriteValue) are correctly translated into calls to the source (REST, OPC UA, etc.).
Benefits
- Reduces debug time by providing a targeted environment.
- Improves the quality of connectors before they are integrated into a real Hub.
- Facilitates the demonstration of connectors to internal teams or customers (rapid proof of concept).
In summary, ConnectorTester is the essential companion for any connector developer: it acts as a laboratory where you can experiment, validate and refine your implementations before going into production.
Interface Overview
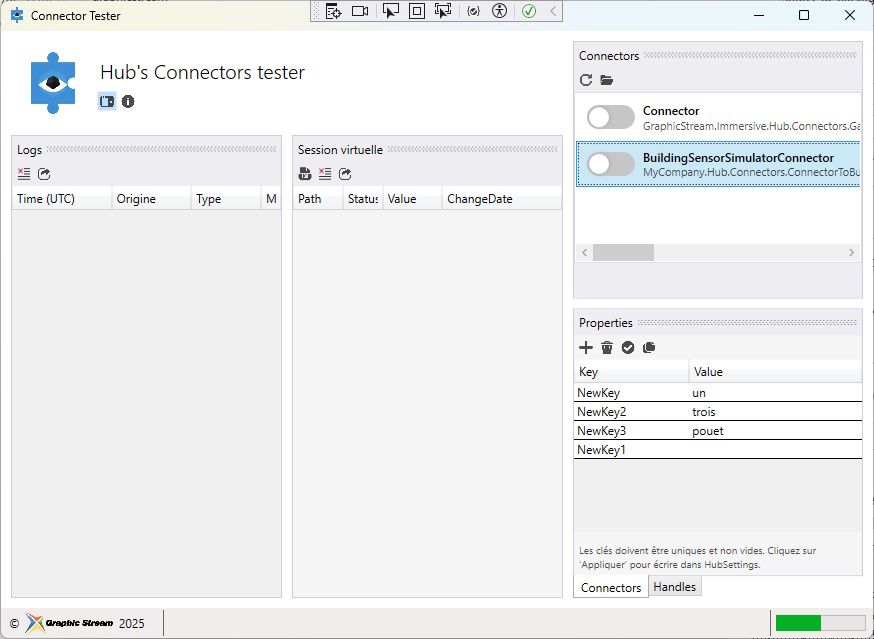
The ConnectorTester is organized into several panels that allow you to control the connectors, view their logs and observe the values of the handles live. Here is a description by main areas:
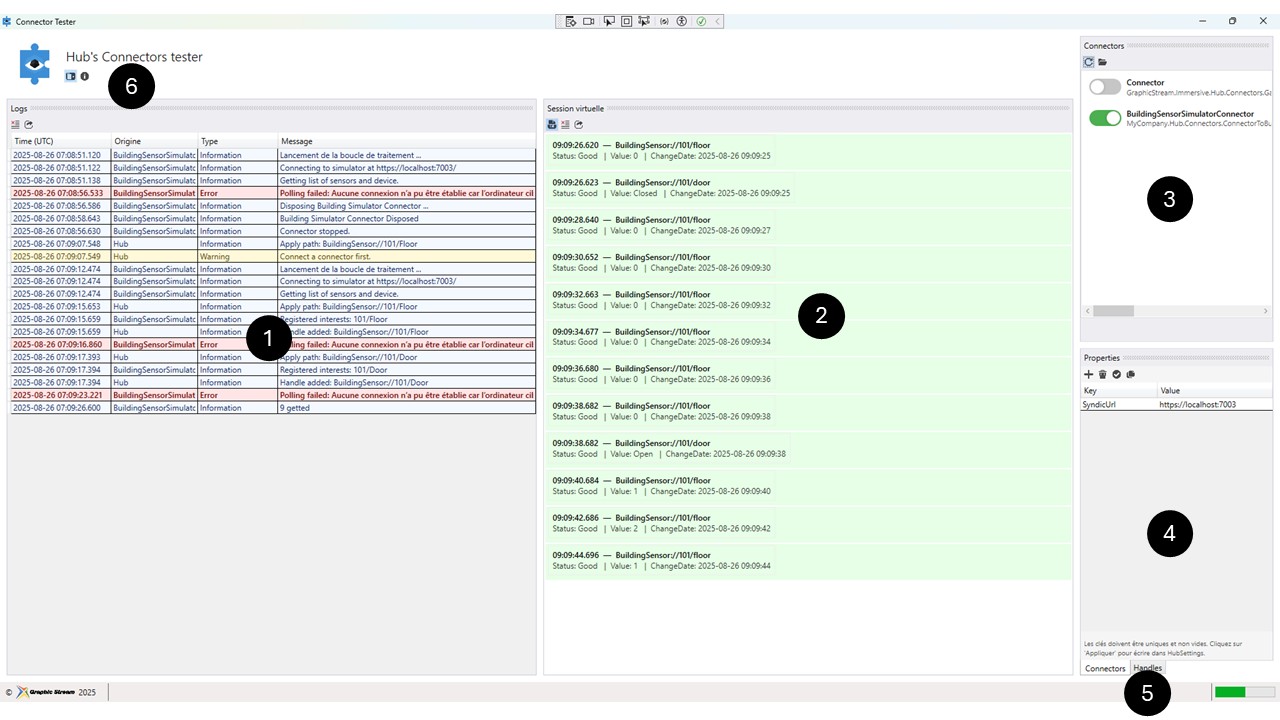
1: The Logs panel
The left panel lists All Events emitted by the Hub and connectors:
- Time (UTC) : The timestamp of the event.
- Origin : The module that produced the message (Hub, BuildingSensorSimulatorConnector, and so on).
- Type : Log level (Information, Warning, Error).
- Message : Detailed description (e.g. "Registered interests: 101/Floor").
It is associated with a toolbar, at the top, which allows, from left to right, to delete the logs and reset this console, or to export the list of current logs in the form of a file.
2: Virtual Session Panel
Part 2 displays the handles tracked in Real-time. Each update with:
- Path of the handle (e.g.
BuildingSensor://101/floor). - Status (Good, Bad, etc.).
- Value : the present value.
- ChangeDate : the timestamp of the data as provided by the source.
Two viewing modes are possible and can be activated via the left button of the toolbar associated with this panel:
- Viewing by handles: All managed handles are displayed in a unitary manner and only their status or value is updated.
- Event-based view: The list displays each event related to a change in a handle in the form of a log list.
The first view gives a general view to a moment t of all handles. The second vision gives a Historization of developments handle values/states.
It is associated with a toolbar, at the top, which allows, from left to right, to change the vision mode as we have just seen, to delete the logs of the associated vision mode and to reset this console, or to export in the form of a file the list of current logs of this panel.
3: List of connectors
In the right/top pane, the Connectors Displays the managed connectors. These connectors are located in the Connectors located at the same level as the executable:
- Each connector is listed with its name and namespace.
- A switch ON/OFF Allows you to activate/deactivate the connector individually. We trigger the methods
IConnector.InitializethenIConnector.Connect. Off TriggersIConnector.Disconnect - The connector status (green for active) reflects its
Status(Connected, Disconnected, etc.).
This panel is associated with a toolbar, at the top, which allows, from left to right: to refresh the list of connectors from the directory Connectors, open the connector directory in Windows Explorer.
4: Properties Panel
Below that, the Properties allows you to define keys/eigenvalues that will be associated with the HubSettings.Properties of the Test Hub instance.
- Each line corresponds to a configuration key (e.g.
NewKey1,NewKey2). - The values can be edited directly.
- Clicking "Apply" pushes these properties into HubSettings.
This panel is associated with a toolbar, at the top, which allows, from left to right: to add a new property, to delete the selected property, to apply the properties to the Hub, to expose (in the form of a json) the list of properties of the panel.
5: Interface Context Tabs
These tabs allow you to switch from managing the Hub with its connectors and properties to managing handles. We'll get to that in a moment.
6: Global Menu
The global menu displays, under the title, a toolbar with two options:
- A button to hide the display context tabs, to give space to the logs and virtual session panels.
- Access to the "About" window.
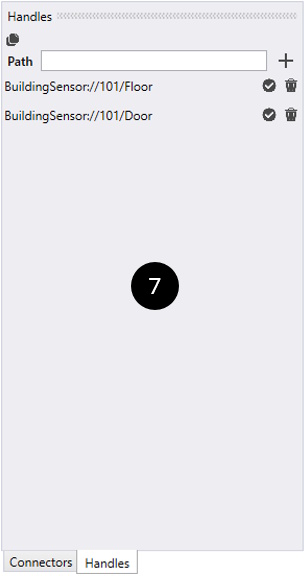
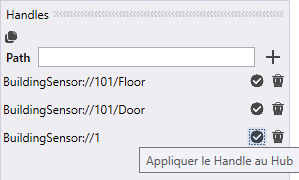
7: Handles Management Panel
Clicking on the corresponding tab brings up the tab to manage handles. They are associated with the property HubSettings.PreloadPaths of the Test Hub instance.
The panel displays from top to bottom:
- A toolbar to copy, to the clipboard, the json of the Handles managed by the Test Hub
- A form with an input field to add a new handle in the form of a path.
- The list of paths managed by the Test Hub.
Each path displayed in this list has two buttons associated with it:
- A button to submit the path to the Hub which will then be submitted to the Connectors already loaded.
- A button to remove the handle from the list of handles managed by the Test Hub.
Use ConnectorTester with a connector
After understanding the role of ConnectorTester, let's see how to use it concretely to test a connector. The tool allows you to dynamically load a connector DLL, instantiate it, and then interact with it as the Hub would.
Download these three Visual Studio projects:
- 📦 BuildingSensorSimulator — v1.0 • 1.8 MB • ZIP
- 🔌 Connector (BuildingSensor) — v1.0 • 8 KB • ZIP
- 🧪 ConnectorTester — v1.0 • 155 KB • ZIP
Download all of these resources, launch related Visual Studio projects to:
- BuildingSensorSimulator : will expose all the devices to be monitored in the form of a Rest service.
- ConnectorTester: Allows you to launch the connector test executable.
Steps to test a connector
- First, add to the project solution of the ConnectorTest project MyCompany.Hub.Connectors.ConnectorToBuildingSensorSimulator.
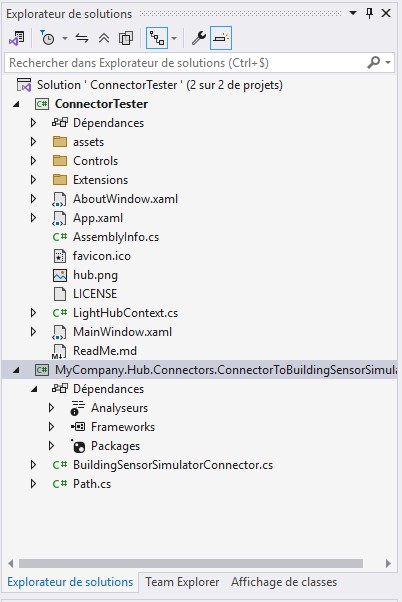
This way, you can compile and launch both projects in a single session, making it easier for you to debug your connector.
- Make sure that the ConnectorTester project is in the startup project.
- Test the compilation and fix any errors.
- Launch the ConnectorTester, and in the connector panels click on the
 icon.
icon. - Keep the directory open, we'll use the address later.
- Add to the ConnectorTester project a project reference to your connector's dll (here MyCompany.Hub.Connectors.ConnectorToBuildingSensorSimulator).
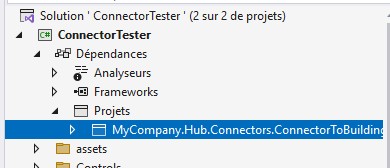
- Open the project properties MyCompany.Hub.Connectors.ConnectorToBuildingSensorSimulator.
- See you in the game Build/Events.
- In "Post-build events" enter the following command:
copy $(TargetPath) C:\Users\valentin\source\repos\ConnectorTester\bin\Debug\net9.0-windows\Connectors
where C:\Users\valentin\source\repos\ConnectorTester\bin\Debug\net9.0-windows\Connectors is the address of the directory of connectors read by the project ConnectorTester that we opened earlier.
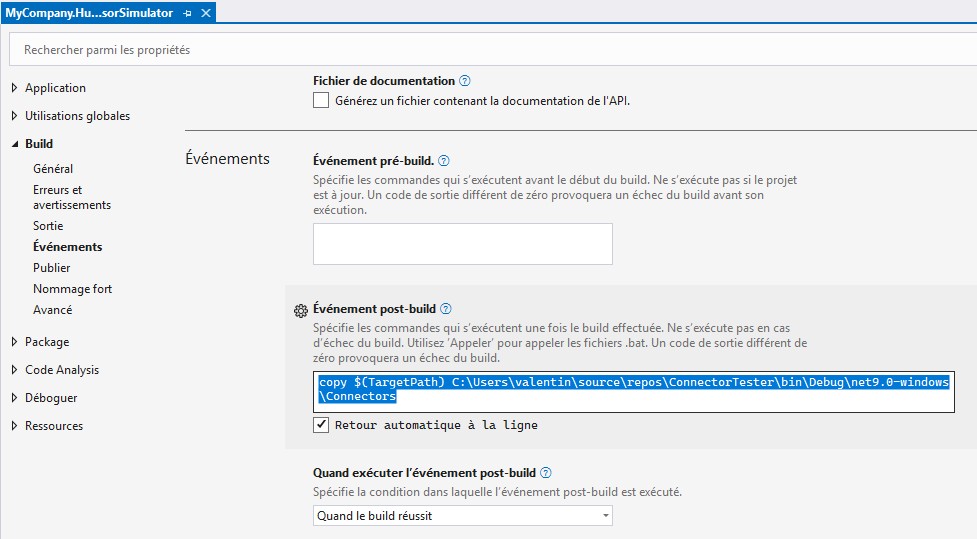
This command will copy the connector DLL to the dedicated directory of the ConnectorTester at each compilation.
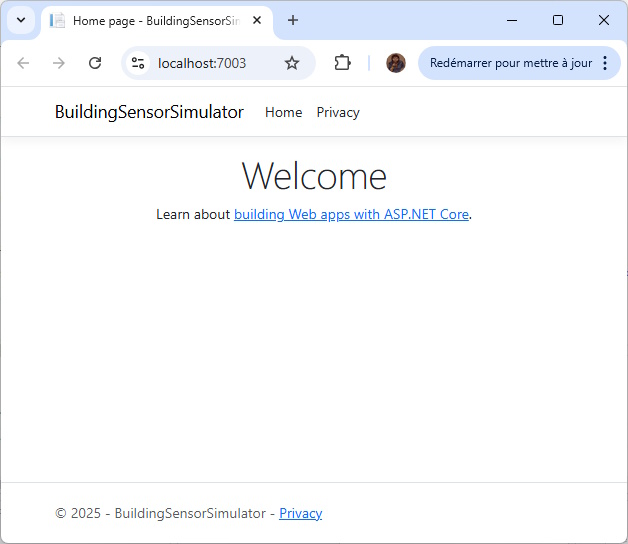
- Compile the project now BuildingSensorSimulator.
- Run it, it must launch on
https://localhost:7003.
- Compile the project now BuildingSensorSimulator.
- Run it, it must launch on
https://localhost:7003.
We are now ready to test our connector.
- Run it project ConnectorTester.
- The panel of Connectors should display the connector ConnectorToBuildingSensorSimulator
- Place a breakpoint in the
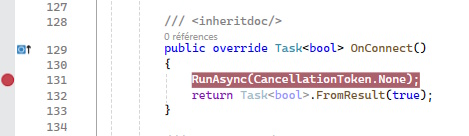
OnConnectof the classBuildingSensorSimulatorConnector.
- In the connector panel, enable the connector BuildingSensorSimulatorConnector by clicking on the associated Switchbutton (which should turn green):

The breakpoint activates and the application makes the stop in debugging:
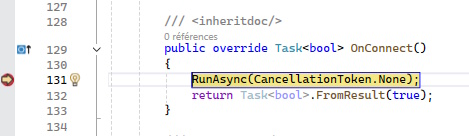
We are able to debug our connector.
Steps for testing handles
We assume here that we have launched our connector in debugging from the ConnectorTester as explained in the previous point.
- Click the Handles after activating the connector BuildingSensorSimulatorConnector.
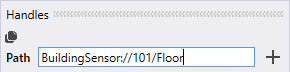
- In the input field of this tab, enter the path as we defined it in the linked tutorial (See dedicated point)
BuildingSensor://101/floor
- Do the same for the following paths:
BuildingSensor://201/door
BuildingSensor://1/
- Validate with the Enter or via the
 icon.
icon. - Once the path is added to the list, you can click on the
 validation button to the right of it to ask the Hub to take it into account
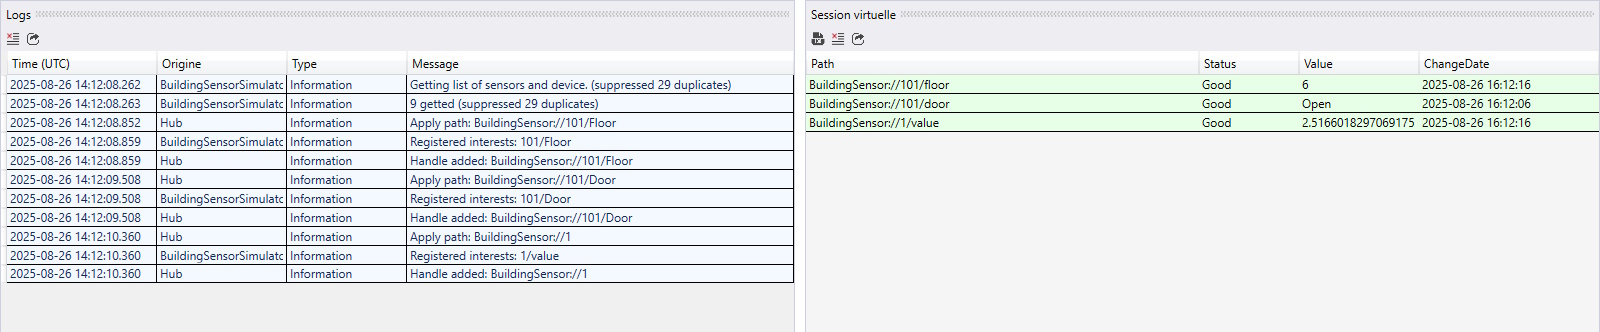
The panels of Logs and that of Session specify the correct handling of the Handle: